


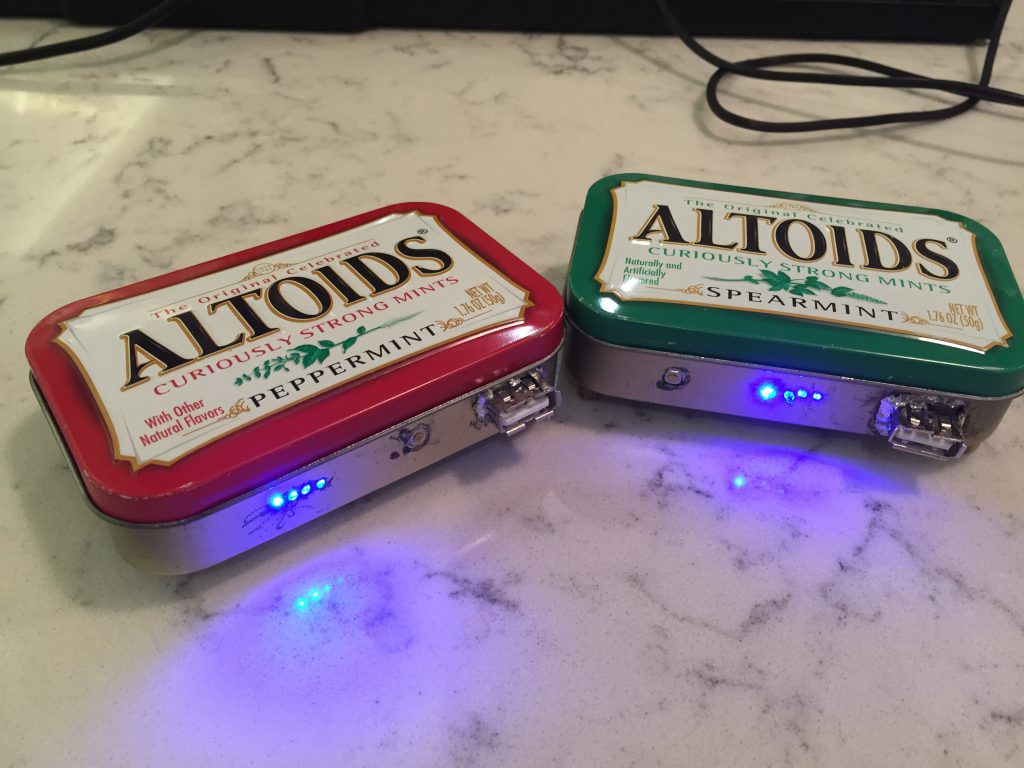
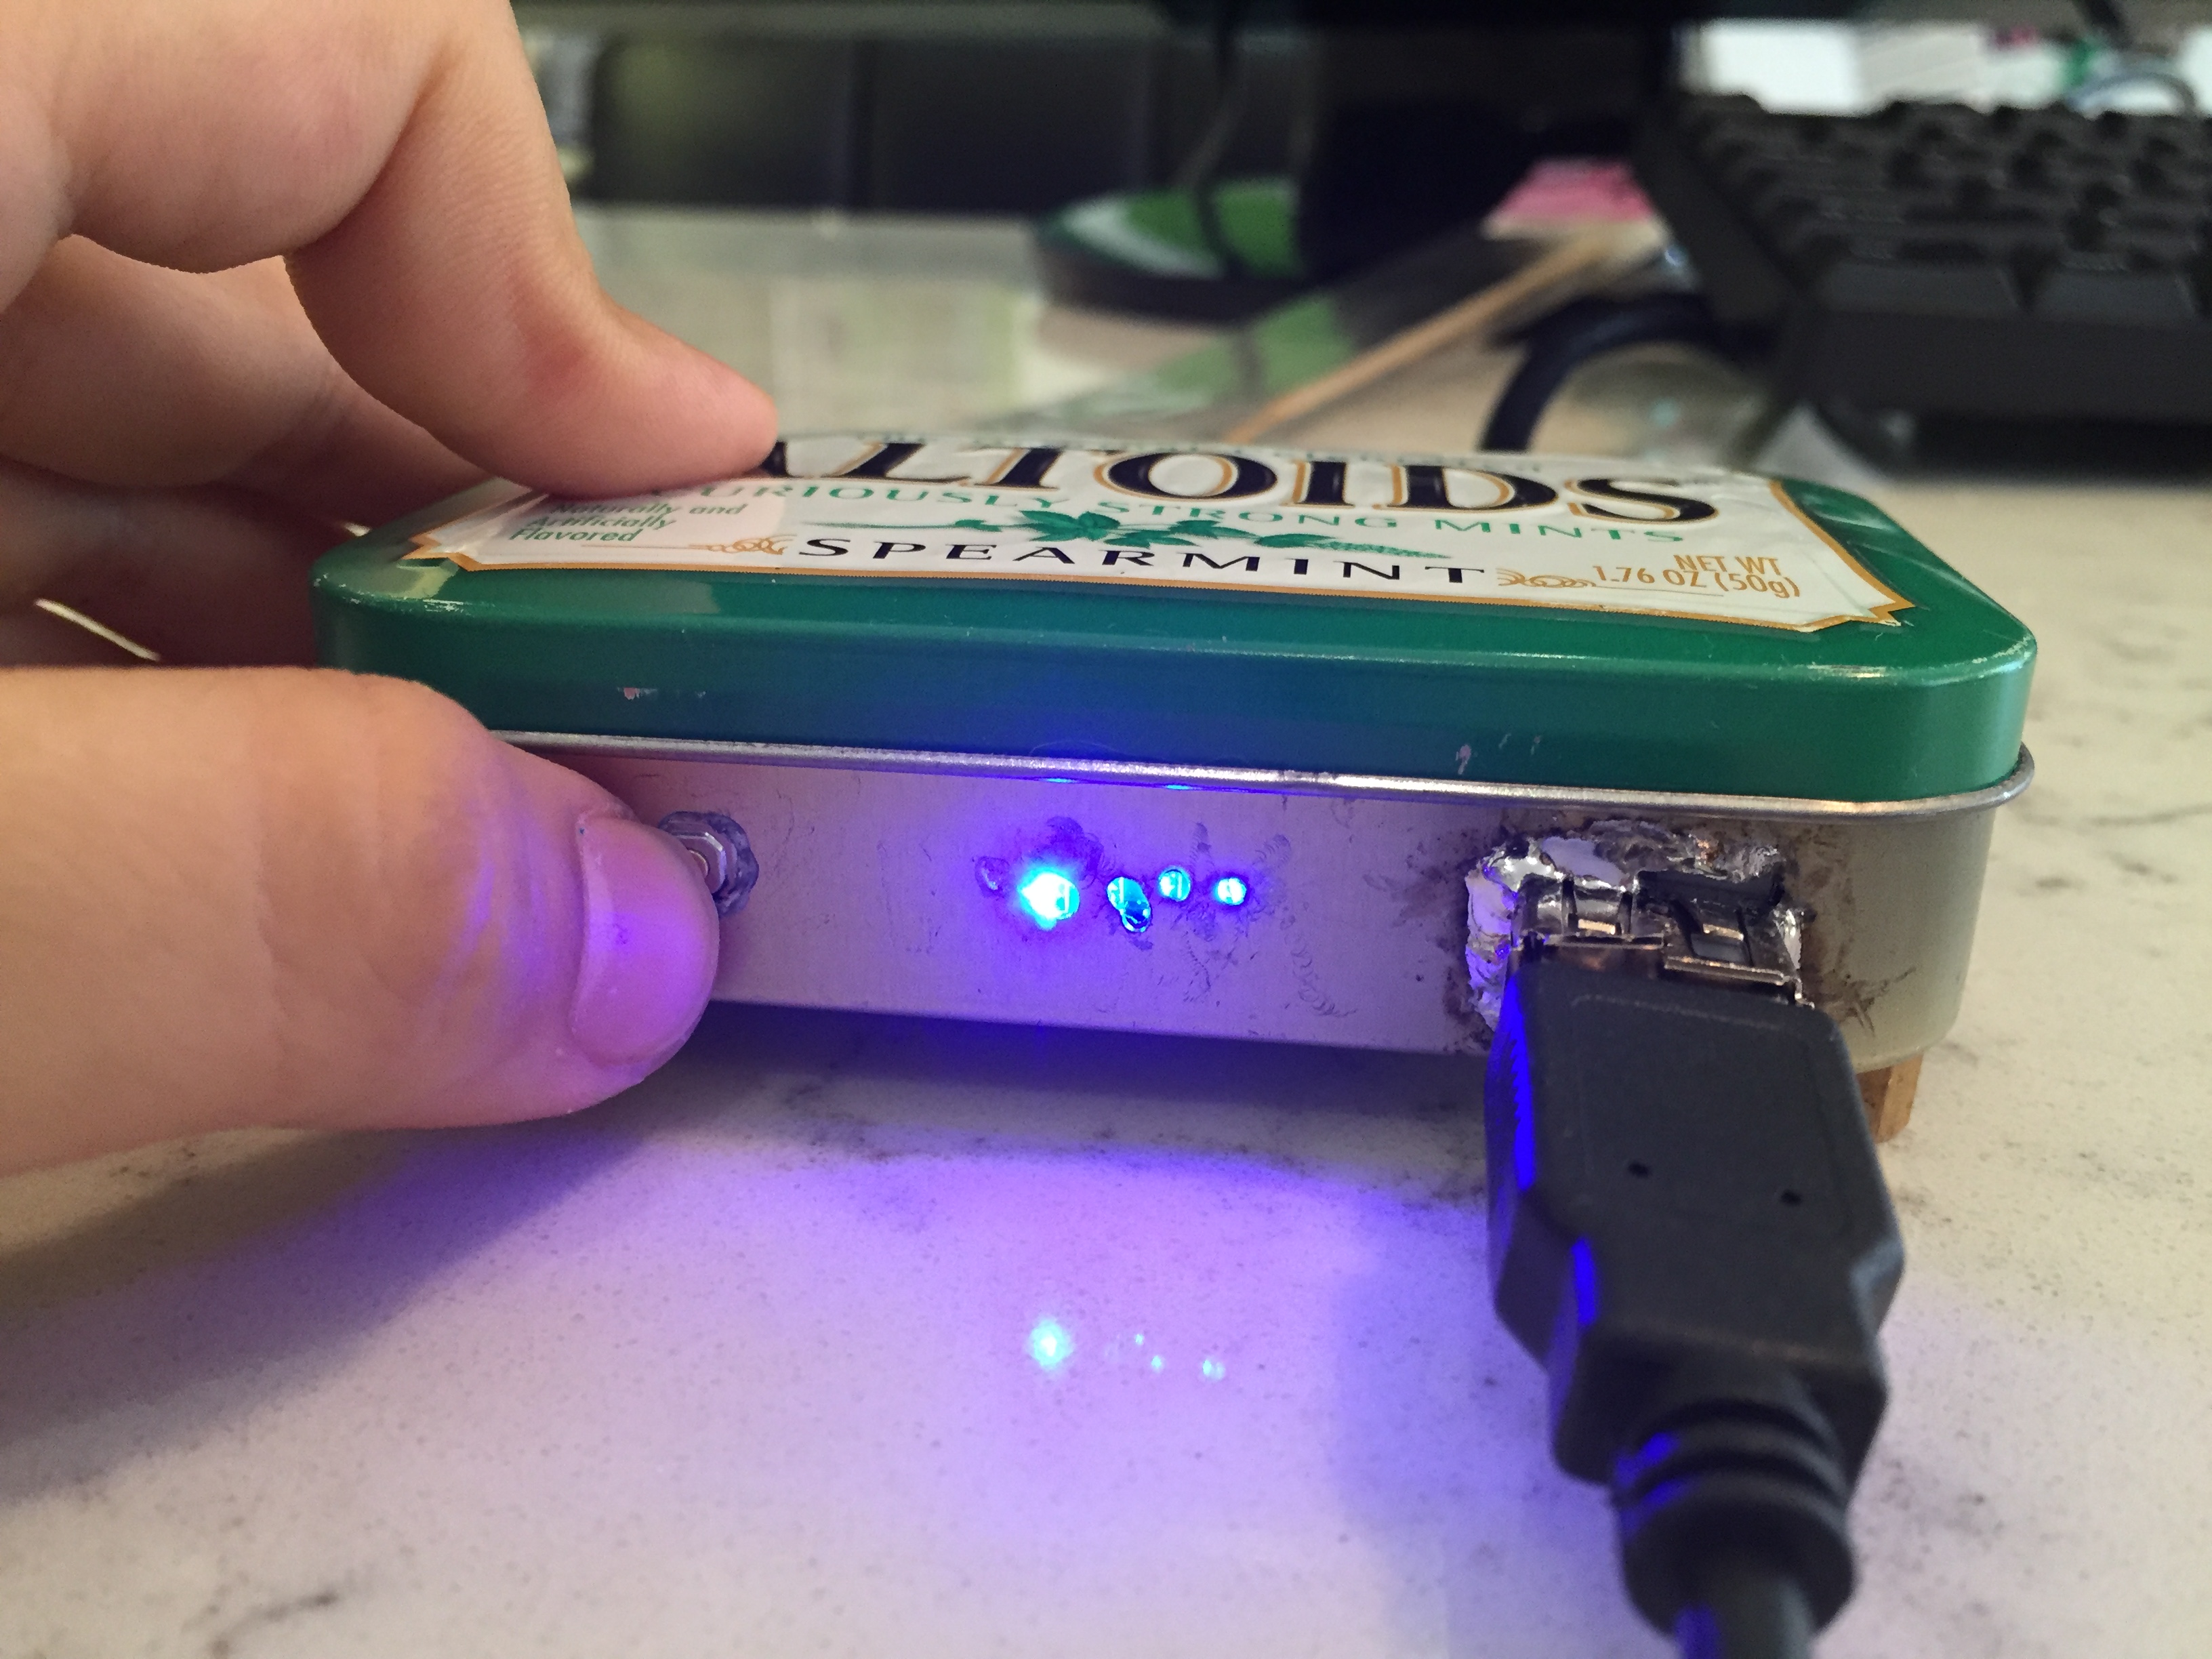
This is a slide show : click the picture to continue to the next picture!
[BMo_scrollGallery id=2 sG_thumbPosition=bottom]
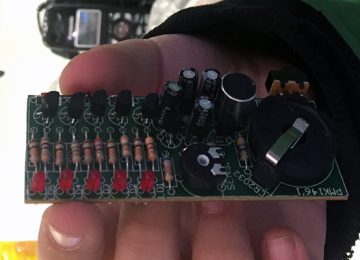
You can build your boot chip from retropie’s website and instructions : https://retropie.org.uk
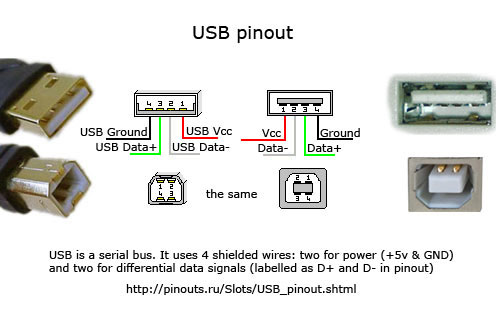
USB Header Pin Diagram:
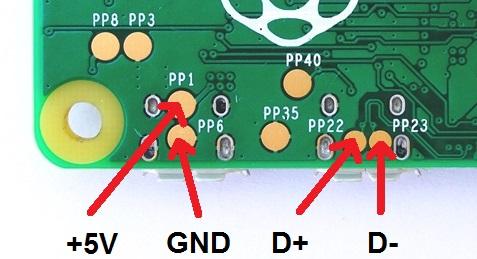
Raspberry Pi zero bottom pads
40-Pin Raspberry Pi GPIO


Why use a batery? Use some capacitors and an ac adaptor instead of a charger? Its not a psp. It needs a full sized HDMI head so… only full monitors? which assumes that everywhere you go there will be an outlet receptacle of some kind.
I used a battery because there will not always be an easy to access outlet where ever you go. The reson i used a charger instead of ac adapters and some capacitors is because i wanted to base it aroud the battery. my current project, the pi tablet uses the same battery technology. take a look at our field test on my recent road trip.Heres the link
http://www.notabomb.org/altoids-game-box-road-test/
I got to use this retro game system and found it to be outstanding. It has so many games that I know I will never be bored. My favorite game is Legends of Zelda: A Link into the past. The system includes Sega games and Nintendo games. The best part is that it can stay on for 6 hours, but charges for only 4 hours. I am surprised for how long it can stay on. I give it 1,000,000,000,000,000 blue ribbons. GREAT JOB ELIJAH!!! I cannot wait to see your next projects!
Thank you for the complements Daniel T. and Nicolas T. How is the box holing up since i gave it to you have you found any corrupted games or any new favorits, are you intresited in a possible upgrade maybe i could get it to play marathon or quake, online so we can play with online together.
This is so awesome! I’m going to see if my son and I can build one based on your version!
thank you i hope your project with your son goes well, its been a couple weeks hows the project going you can post as a reply or maybe i can do an article about your build.
You should make these and sell them! I would buy this
Can you build me an altoid tin retro game
Unfortunately, I can’t build them for everyone who asks, but the guide is here for you!