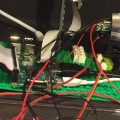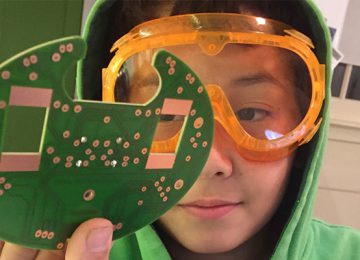


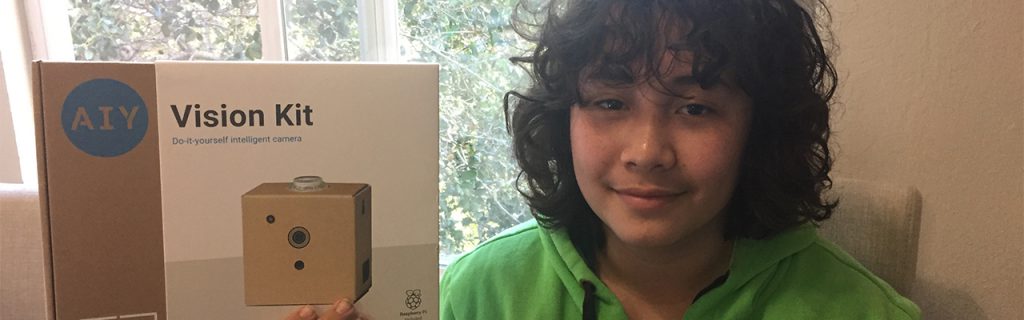
In may 2018, durning the bay area Maker Faire in San Francisco, I bought a google AIY Vision Kit. A few weeks later during my 4th week of living in the San Francisco area I decided to put together my google AIY vision kit and mess around with it for a few days. I did the basics and the tutorials but wanted more. I wanted a basic surveillance camera for my room when I went home to Brooklyn.
[BMo_scrollGallery id=85 sG_thumbPosition=bottom sG_images=1 duration=slow gallery_width=600 gallery_height=400 thumbs_width=100 thumbs_height=100 sG_caption=1 sG_start=1 sG_loop=1 sG_loopThumbs=1 sG_clickable=1 sG_opacity=60 sG_area=200 sG_scrollSpeed=0 sG_autoScroll=0 sG_aS_stopOnOver=1 sG_diashowDelay=50 sG_followImages=1 sG_responsive=1]
Please note, this is not a “secure” way to do this and is not a “security” camera. Anything you do with this script can be seen by anyone and is NOT private. Twilio is not a free service, if you decide to make this script work you will need to fund a Twilio account. $10 or $20 should be enough.
One of the example AIY projects was the “Cat, Dog, Person” detector. It was perfect for what I needed for the detection of people and pets. It had a few limitations and it seemed like it was ready for some edits. I needed to change that it did not send these images anywhere. It had to be run one image at a time. It had to be run from the terminal for each image. It required terminal input to the command so it could find the image. You had to give it an already saved image before it could run. You had to specify an output “save” location for the image google outlined. Just as importantly, the color of the outline wasn’t green.
This project was my first introduction to python3 and I was scared of changing language versions at first but then I learned that python3 is very similar to python2.7. Python 2.7 allows for more flexibility such as not needing parentheses and quotation marks where they might need to go, while python3 is more strict with it’s usage. While python3 may make the code harder to write, it is much easier to read and understand.
For this project I mashed up code from the Raspberry Pi Camera documentation, Twilio, the Google Cat, Dog, Person (Object) detector, and pyimgur. Since I wanted this to be “simple” my goal was to stick as close as possible to the “example” code I found at each source.
Adding the pi camera seemed like the best first thing to do. Twillio was second. The reason I used twilio was because I didn’t want to add modem to the outside of the google AIY, and I did not want to buy a sim chip. Finally the reason I used Imgur because it was the quickest way to send an image by Twilio (that I could find). Adding the Imgur link was the second to last part I finished.
Finally, I added a simple loop to make it repeat. Inside the loop, I save an edited file only if there is something detected. If the message is empty it will wait 10 seconds before running the loop again, but if it detects something it will slow down the process to 60 seconds before starting the loop again. The reason for making it wait longer is when my cat is in one place for an hour I do NOT want to receive 360+ text messages.
One of the issues I had with one version of my build is that it filled up the pi with too many photos of nothing being detected. One flaw in this method is that I save the camera file to disk, then open it and use it with google’s AIY inference code. To fix this I had it delete the unedited photo that it took (“infile” in the code below). The result is that it now only saves edited photos that have been detected as either a person, dog or cat.
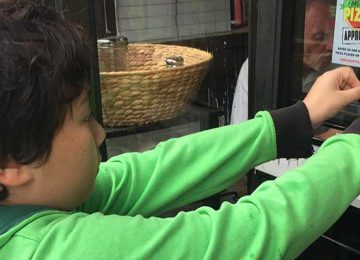
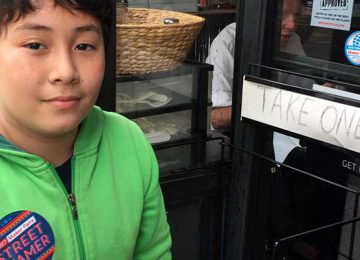
This project has been really successful in alerting me when something is on camera. One problem is with the Raspberry Pi camera – sometimes it turns purple! So far google recognition AI has been really good at seeing things but not been very good at identifying what a cat, dog, or person is, for example:
[BMo_scrollGallery id=86 sG_thumbPosition=bottom sG_images=1 duration=slow gallery_width=600 gallery_height=400 thumbs_width=100 thumbs_height=100 sG_caption=1 sG_start=1 sG_loop=1 sG_loopThumbs=1 sG_clickable=1 sG_opacity=60 sG_area=200 sG_scrollSpeed=0 sG_autoScroll=0 sG_aS_stopOnOver=1 sG_diashowDelay=50 sG_followImages=1 sG_responsive=1]
There are a few things I want to change now that it is stable, and working
- Use the “taken” photo directly, do not save it to disk first
- Stream live video to my phone from anywhere
- Use a Sim Card and Modem to send MMS (I have documentation at : http://www.notabomb.org/send-mms-from-serial-port-on-raspberry-pi/)
TO MAKE THIS SCRIPT WORK :
Needed : You need to know how to use a raspberry pi, how to use python, how to create and save a python text file.
First : You need to build a google AIY vision kit & run at least one example project
https://www.adafruit.com/product/3780
IF YOU ARE UNDER 18 ASK YOUR PARENTS TO HELP WITH TWILIO & IMGUR – I DID!
Register a Twilio account and create a new project. Your project will need some funding, $10 or $20 will do to get started
When you “Create A New Project” :
- Choose “Products”
- Choose “Programmable SMS”
- Give your new project a name.
- Get the “SID” for your new project
- Get “Auth Token” for your new project
- Register a “telephone number” with Twilio and make sure it has SMS/MMS capability
Register an imgur account
- In settings, add an Application
- Get the Client ID of your new Application
Run the following commands on your pi from terminal to install imgur and twilio
- sudo pip3 install pyimgur
- sudo pip3 install twill
Save the script into your AIY EXAMPLES directory as “objCamera.py”
note – my examples directory is “~/AIY-projects-python/src/examples/vision/”
Open the file so you can edit it.
You will need to edit the script a little : (do not delete any quotation marks)
- Change TWILIO_SID in line 53 to the SID you got from from Twilio
- Change TWILIO_AUTH_TOKEN in line 54 to the Auth Token you got from from Twilio
- Change IMGUR_CLIENT_ID in line 56 to the client ID you got from IMGUR
- Change +17777777777 in line 164 to the phone number you are sending MMS to (US NUMBERS START WITH +1)
- Change +15555555555 in line 165 to the phone number of your Twilio Account (US NUMBERS START WITH +1)
In terminal, change to your examples directory and then “chmod” the script so it can be run
- cd ~/AIY-projects-python/src/examples/vision/
- chmod 755 objCamera.py
The last thing you need is a desktop folder for your saved output files
- mkdir ~/DiscoBunnies
Run the file, and watch the results come in – in terminal, type :
- ./objCamera.py
Here’s the script, have fun!
|
1 2 3 4 5 6 7 8 9 10 11 12 13 14 15 16 17 18 19 20 21 22 23 24 25 26 27 28 29 30 31 32 33 34 35 36 37 38 39 40 41 42 43 44 45 46 47 48 49 50 51 52 53 54 55 56 57 58 59 60 61 62 63 64 65 66 67 68 69 70 71 72 73 74 75 76 77 78 79 80 81 82 83 84 85 86 87 88 89 90 91 92 93 94 95 96 97 98 99 100 101 102 103 104 105 106 107 108 109 110 111 112 113 114 115 116 117 118 119 120 121 122 123 124 125 126 127 128 129 130 131 132 133 134 135 136 137 138 139 140 141 142 143 144 145 146 147 148 149 150 151 152 153 154 155 156 157 158 159 160 161 162 163 164 165 166 167 168 169 170 171 172 173 174 175 176 177 178 179 |
#!/usr/bin/env python3 # Copyright 2017 Google Inc. # # Licensed under the Apache License, Version 2.0 (the "License"); # you may not use this file except in compliance with the License. # You may obtain a copy of the License at # # http://www.apache.org/licenses/LICENSE-2.0 # # Unless required by applicable law or agreed to in writing, software # distributed under the License is distributed on an "AS IS" BASIS, # WITHOUT WARRANTIES OR CONDITIONS OF ANY KIND, either express or implied. # See the License for the specific language governing permissions and # limitations under the License. """Object detection library demo. - Takes an input image and tries to detect person, dog, or cat. - Draws bounding boxes around detected objects. - Saves an image with bounding boxes around detected objects. """ #--------------------------------------------------- #Import Libraries import os from time import sleep from picamera import PiCamera from datetime import datetime from twilio.rest import Client #io library allows you to open and close files import io #sys allows terminal commands from inside python import sys #pyimgur allows you to send things to the imgur service import pyimgur #PIL : python image library #These librarys allow you to edit the image from PIL import Image from PIL import ImageDraw #imports the google AI image recognition libraries from aiy.vision.inference import ImageInference from aiy.vision.models import object_detection #--------------------------------------------------- #set string variables #Twilio variables account = "TWILIO_SID" token = "TWILIO_AUTH_TOKEN" #Imgur variable CLIENT_ID = "IMGUR_CLIENT_ID" #--------------------------------------------------- #set object variables camera = PiCamera() client = Client(account, token) im = pyimgur.Imgur(CLIENT_ID) #--------------------------------------------------- #crops image to center and sends back the croped image def _crop_center(image): width, height = image.size size = min(width, height) x, y = (width - size) / 2, (height - size) / 2 return image.crop((x, y, x + size, y + size)), (x, y) #--------------------------------------------------- #main routine runs when script is called def main(): #--------------------------------------------------- forever = 1 sleepTime = 2 while forever == 1: sleep(sleepTime) #--------------------------------------------------- #makes variables pointing to strings containing a path to save and load images #names file year month day hounr minute and second to image name infile = "/home/pi/Desktop/DiscoBunnies/" + datetime.now().strftime('%Y%m%d%H%M%S') +'.jpg' outfile = "/home/pi/Desktop/DiscoBunnies/" + datetime.now().strftime('%Y%m%d%H%M%S') +'_out.jpg' #--------------------------------------------------- #takes picture and saves image to infile camera.resolution = (1024,768) camera.start_preview() sleep(2) camera.capture(infile) camera.stop_preview() #--------------------------------------------------- #starts a blank message msg = "" #--------------------------------------------------- #makes infrence on what is inside the image cat, dog, or human with ImageInference(object_detection.model()) as inference: #makes new image object by opening infile location image = Image.open(infile) #makes new image object called image_center, imnage_center is always a square #offset is the x and y point of the top left corner of the square croped image image_center, offset = _crop_center(image) #opens a new object in the draw library allowing you to edit the image draw = ImageDraw.Draw(image) #makes an aray of objects from google for a list of cats dogs and humans from the image center, result = inference.run(image_center) #loops through each object returned by google #in each loop the object number is "i" and obj contains the object representing an item found for i, obj in enumerate(object_detection.get_objects(result, 0.3, offset)): #the object it returns is the kind of item which was detected, the score of which it is confident # that it is corect, the description of where the item is located in the croped center # by describing the item x, y, width, and height of the item it has detected #prints the object number and the full text returned by google print('Object #%d: %s' % (i, str(obj))) #adds current object number and full text at the end of msg string and also adds a return msg = msg + 'Object #%d: %s' % (i, str(obj)) + "\r " #creates four variables one each for # x contains the horizontal offset in pixels to the top left of the detected item box from zero # y contains the vertical offset in pixels to the top left of the detected item box from zero # width contains how many pixels wide the box around the detected item is # height contains how many pixels tall the box around the detected item is x, y, width, height = obj.bounding_box #outlines the object google detected with a green box draw.rectangle((x, y, x + width, y + height), outline='green') #--------------------------------------------------- if msg != "": sleepTime = 60 #saves the new image to outfile image.save(outfile) #print the file name to the command prompt print(outfile) #uploads image to imgur with the name: WARNING INTRUDER, or just a cat imgurImg = im.upload_image(outfile,title="WARNING INTRUDER, or just a cat") #this sends a message with a link from imgur by using twilio as an sms message # to is the number you are sending the message to # from is the number the to number will be reciving it from # body is everything we added to the variable msg earlier # media is the imgur link message = client.messages.create( to="+17777777777", from_="+15555555555", body="detected:\r " + msg, media_url=imgurImg.link, ) else: sleepTime = 10 os.remove(infile) if __name__ == '__main__': main() |